
 by Lettuce Be |
Last Updated: 10/02/2021
by Lettuce Be |
Last Updated: 10/02/2021 Contents
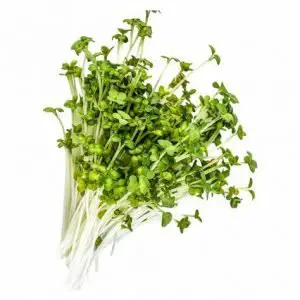
More and more “baby” vegetables have appeared in the produce aisle in recent months, and the most popular are microgreens and baby greens. These babies of the garden pack some aromatic flavor that can give a nutritional punch to a variety of dishes. Plus, they’re also tagged as superfoods, surpassing the nutrients available from regular crops.
Aside from being delicious, they’re also gorgeous, adding a splash of fuchsia, orange, and yellow to your plate. So it’s no wonder buyers are so desperate to acquire them. Perhaps you have not been keeping up with this trend yet—and are wondering if the hype justifies the use of these little, fresh greens in the diet. Today, we’ll provide some tips for harvesting them at home.
What exactly are microgreens and baby greens?
 Let’s start with terminology. Both terms—microgreens and baby greens—have been concocted by marketers rather than by actual farmers. The general gist of their meaning is:
- Microgreens: These little guys earn their name once they grow their root structure and first leaves, called cotyledon leaves, even days before the germination process. From the point that proto-leaves develop in the seed until they get their first true leaves, they’re considered microgreens. As a general rule, microgreens should be harvested after two weeks.
- Baby greens: The vibrant greens harvested in this manner are usually harvested before they reach full size. They have at least one true set of leaves but are a couple of inches smaller than mature plants.
You can find countless vegetables as microgreens or baby salad greens that are as delicious as the full-grown versions. Here are a few examples:
- Amaranth
- Arugula
- Basil
- Beet greens
- Cabbage
- Carrots
- Celery
- Chard
- Chia
- Chives
- Cilantro
- Fennel
- Garden Cress
- Kale
- Kohlrabi
- Lettuce
- Mustard greens
- Parsley
- Peas
- Radish greens
- Spinach
- Sunflower
- Watercress
The versatility of these little vegetable greens is one of the reasons people love them. These greens can be used as a garnish, added to salads, stirred into “zoodles” (which go great with any pasta substitute here), sprinkled inside lettuce wraps, stirred into scrambled eggs, or used in sushi or just nibbled on individually.
Are These Greens Superfoods?
A lot of people believe that microgreens are packed with high amounts of vitamins in a really small package. However, is this true? In a word, yes! Especially for microgreens. Researchers discovered in one study that microgreens have four to 40 times as many concentrations of vitamins as mature vegetables. Finally, another study discovered microgreens from the Brassica family contain 164 polyphenols, powerful levels of nutrients.
If you still want to experience their potential health benefits, mix and match different microgreens with different nutritional make-up. Common microgreens such as red cabbage, garnet amaranth, and green daikon radish are an excellent source of vitamins C, K, and E. On the other hand, cilantro microgreens are rich in vitamins A, E, and beta-carotene.
Generally speaking, microgreens have fewer essential nutrients than baby greens, while they have significantly more than mature greens. Research has shown that a three-ounce serving of arugula microgreens offers 61 percent of a person’s daily vitamin C requirement, while the same quantity of baby arugula delivers 20 percent, and mature arugula provides just over 7 percent.
Growing Your Own
Planting popular baby greens requires simple steps that are not harder than growing adult greens. Just plant a variety of seeds or seedlings in your indoor garden, harvest them when they are small, and then use them right away. Growing microgreens is easy, too. Here’s how to do it:
The easiest and quickest way to make sure you have everything you need is to buy a microgreen growing kit. Make sure your microgreen seeds are organic, certified pathogen-free, and labeled “sprout”, as well as using rich soil medium and sterile growing equipment. Make sure your planter has adequate drainage and a drainage pan to place beneath it if you make it yourself.
If the instructions do not specify otherwise, try soaking your seeds overnight in 1/3 cup hydrogen peroxide in 1-2/3 cups of water. This will protect your seeds from mold and pathogen contamination.
- After soaking the plant seeds, drain them carefully.
- Press your seeds into your potting soil gently and sprinkle your seeds over them.
- Once or twice a day mist the soil with water. Do not overwater them. What you want are damp seeds, not a swimming pool!
- Cover the seeds with clear plastic over the hole in the plastic wrap. If the kit you purchased came with one, you can use it instead.
- Place your sprouts in a sunny spot or under grow lights in your home, and be patient. It will be several weeks before they are ready for consumption.
- When you’re ready to harvest your microgreens, just wait until their true leaves form (not mature leaves) and then cut them out with sterilized scissors above the surface of soil. Wash gently in a fine-mesh sieve. Dry them on paper towels and use them immediately.
Good things are indeed contained in small packages. So go ahead and plant some microgreens, or start a garden in your backyard. Then sprinkle them around and your cells will be loaded with vitamins, minerals, and phytochemicals.
