
 by Lettuce Be |
Last Updated: 07/20/2021
by Lettuce Be |
Last Updated: 07/20/2021 A microgreen is simply a green, lettuce, or herb harvested when it is very young – typically when it is about an inch tall. Even though microgreens are tiny, they are a huge trend, found everywhere from corner cafes to supermarkets wrapped in plastic. According to reports, these greens contain more nutrients per ounce than mature plants of the same species.
Microgreens are not cheap if you have ever shopped for them! Growing microgreens is easy, whether inside or outside. Their quick harvest requires little effort on your part.
You can add microgreens to a fresh salad, sandwiches, or stir-fries. You can experiment with different varieties of microgreens, adding the ones you like the most. Plants like these deserve a spot in your garden, and if you’re limited on space, you can grow them in containers.
What Can You Grow as a Microgreen?
 Almost any type of lettuce, salad green, or herb can be grown as a microgreen. It is easy to start with a prepackaged seed starting mix, and there are many microgreen mixes available, or you can choose a mesclun mix to grow as microgreens.
As examples of types of microgreens to grow, here are a few:
- Arugula
- Basil
- Beet greens
- Cabbage
- Endive
- Kale
- Lettuce
- Mizuna
- Mustard
- Peas
- Radish greens
- Spinach
- Tatsoi
- Watercress
Germination
The step by step cultivation of a variety of microgreens is quite simple. The plants can be grown outside, in a garden bed, or a clean container indoors on a sunny windowsill. You can utilize natural sunlight, and a grow light or artificial lights as a light source.
Prepare the soil surface by loosening it and raking it smoothly while planting microgreens in your garden bed. It would help if you spread your microgreen seeds one eighth- to one-quarter-inch apart. The plants are harvested quickly, so you won’t have to give them a lot of room. Seed should be spread over the area and covered with about 1/8 inch of organic potting soil.
Consider selecting a shallow tray with drainage holes or a shallow container with a diameter of at least two inches and a depth of at least two inches. Smooth the soil and fill it with an organic potting mix of good quality. Cover the layer of seeds with 1/8 inch of soil and space them about 1/8 inch apart. Use a spray bottle to keep the soil moist with clean water and place it in a sunny spot or near natural light to get four hours of adequate light. Ideally, it would help if you grew them in a south-facing window, but a western- or eastern-facing window will do as well. To prevent excess moisture and better air flow, opening the sunny window occasionally may also be beneficial.
You will accelerate germination with a heat mat, but it is not entirely necessary. The optimal combination of adequate temperatures, ventilation, and light requires additional attention and resources.
Care
Ensure that the layer of soil does not dry out completely and that weeds are removed so that the tiny greens don’t have to compete with them for nutrients and cold water. Also, you don’t have to fertilize the greens during their growing process since you’ll be harvesting them so early. This is perfect if your garden bed has lots of organic matter.
If you are planting in containers, you can mix some organic fertilizer granules with the soil before you plant. It is essential if you plan on using the soil for more than one planting of greens.
Microgreens are usually not affected by pests or diseases since they grow for such a short time. However, you may want to cover microgreens with a floating row cover if you are growing brassicas in your mix (mustard, kale, etc.) and you have cabbage worm problems.
Harvest
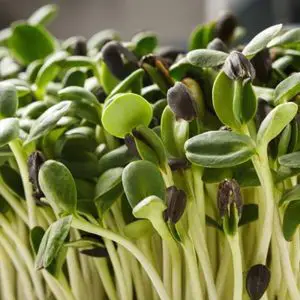
During seed germination, seed leaves are the first leaves you’ll see. The green leaves look nothing like the actual leaves of the plant. Microgreens are harvested when they have developed their first set of true leaves, which occurs about ten days to two weeks after planting. Typically, plants grow up to 2 inches tall. Snip the microgreens with sharp kitchen scissors just above the soil level to harvest.
Microgreens are not like mesclun or baby greens in that you will not be able to harvest more than one crop from one planting. You’re snipping off everything but the very bottom of the stem of the plants, which means they have no way to regenerate new growth. You should store the fresh vegetables in the refrigerator in an airtight container wrapped in paper towels.
Planting another crop after harvest is as easy as scattering fresh microgreen seed and covering it with soil. Old roots don’t even need to be removed; they are excellent sources of organic matter.
